Use the scheduling interface
The scheduling interface is where you cast each show: who’s in the lineup, in which role, for which date. Open it on your scheduling day and work through the shows that need lineups.
Find your show
Section titled “Find your show”Open Scheduling in the top nav. The left column lists every show you can cast, grouped by what’s due now, what’s already scheduled, and what’s coming up later (in a collapsed “Schedule by…” disclosure at the bottom).
A circle to the left of each show name shows its state at a glance:
- Color — green means marked as scheduled; gray means not yet.
- Fill — solid means every role is filled; partial means some roles are filled; empty means no roles are filled.
So a partial-gray circle is “not scheduled yet, some roles cast”; a solid-green circle is “scheduled and complete.” That’s your work-to-do indicator.
A Filter by show dropdown above the list narrows to one show. Show past brings up shows that have already happened — useful if you need to review or correct historical lineups.
If you’re an admin, you see every show. If you’re a show manager for specific shows, you only see those.
Cast a show
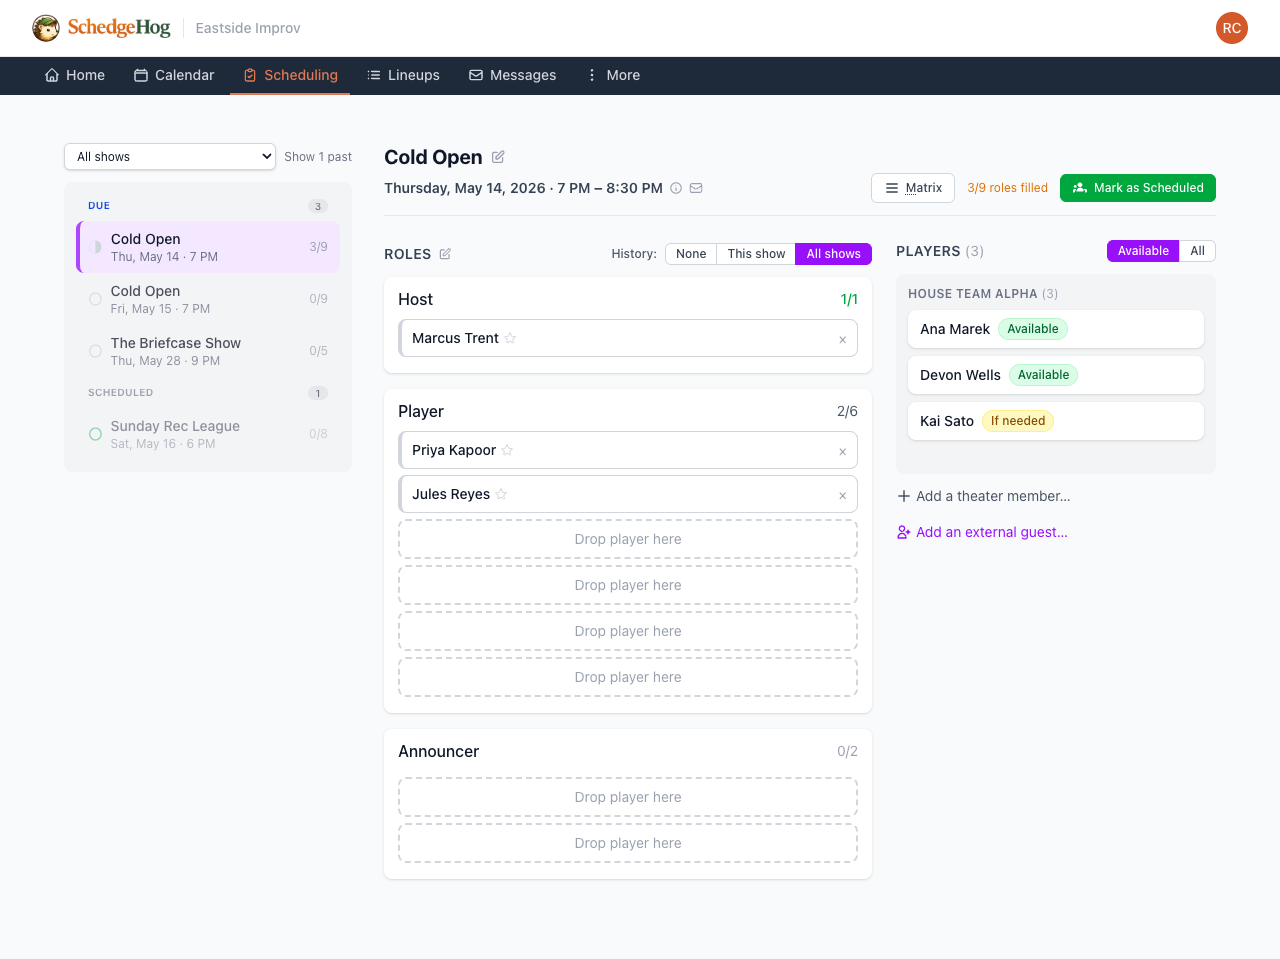
Section titled “Cast a show”Click any show in the left column to load it. The workspace shows three columns:
- Show details at the top — name, date, time, and venue. Edit pencils next to the name and the Roles header let you override details just for this date (see Override roles or details for one date below).
- Roles in the middle. Each role shows how many slots are filled (e.g., 2/6) and the names of any cast players. Empty slots show “Drop player here.”
- Players on the right, grouped by ensemble. Each player has an availability badge: Available, If needed, or Unavailable. A player in two ensembles shows up under each.
Two toggles control what you see:
- Available / All on the players column. Available shows only players who said yes (or if-needed). All also shows players who said no or never responded — useful when you need to cast someone who told you they could play but never logged in.
- History: None / This show / All shows above the roles. History adds recent and upcoming assignments under each player’s name, so you can balance playing time. This show counts only assignments for this show; All shows counts every show at the theater.
To cast:
- Drag a player into the role you want them in.
- Click a player’s name to drop them into the next open slot.
- Drag onto another player to swap.
- Click the × on a player to remove them from the lineup.
If you have role protection set on a role, you’ll see a warning under a player’s name when they’ve had that role recently or are about to. The warning doesn’t stop you — it just lets you decide knowingly.
Add someone who isn’t in the eligible ensembles
Section titled “Add someone who isn’t in the eligible ensembles”At the bottom of the players column:
- + Add a theater member — pick any player at your theater, even one who isn’t in the show’s regular ensembles.
- + Add an external guest — bring in someone who isn’t a member of your theater. Add an email address and the guest gets the same reminders and notifications regular players do.
Check fairness with the matrix
Section titled “Check fairness with the matrix”Click Matrix at the top of the workspace, or press M. Matrix mode shows every player as a row and upcoming/recent shows as columns, with a role badge in each cell where they’re cast.
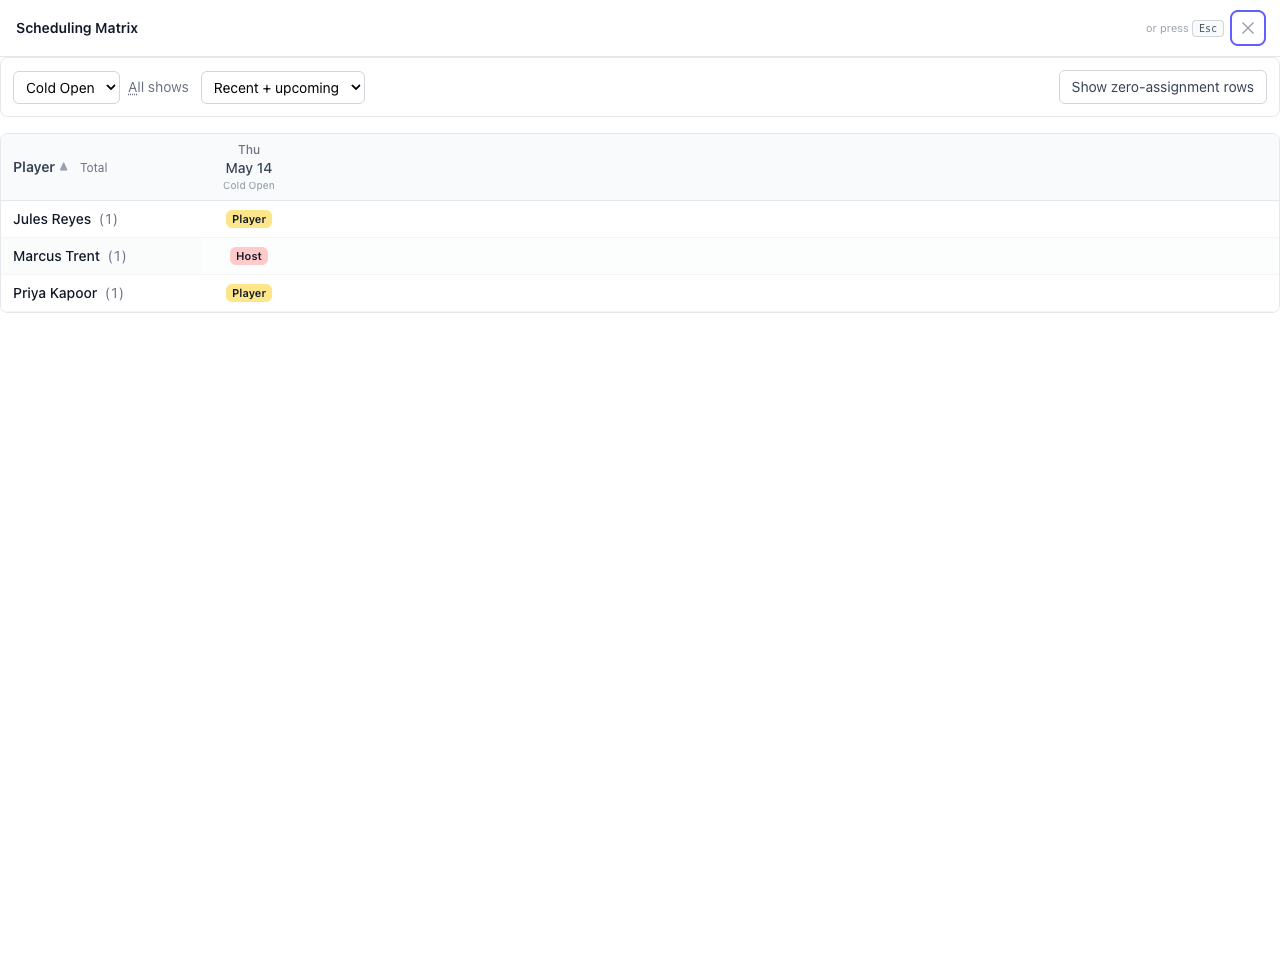
Use the dropdowns to filter by show and adjust the time window. Click any role name in a column header to pop up that role’s history across players (“who’s been Host lately?”). Press Esc to close the matrix.
Override roles for one date
Section titled “Override roles for one date”If a specific date needs different roles from the show’s template — eight players instead of six, an extra role, fewer slots in one role — you can override for that date alone, without touching the template.
Click the pencil next to Roles to enter edit mode.
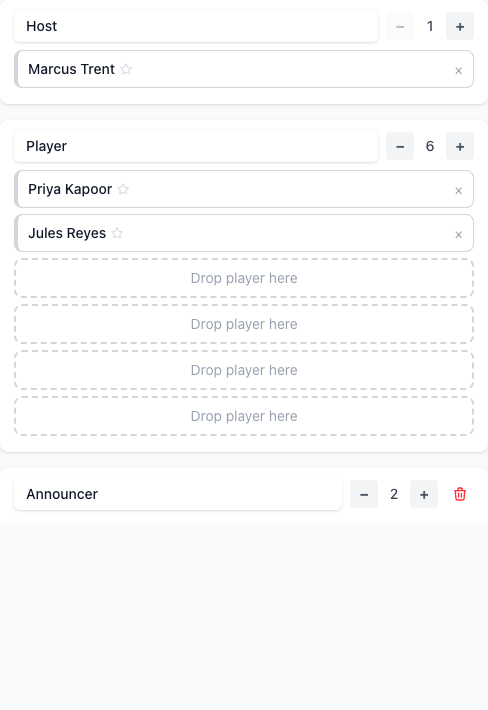
Once you’re in edit mode:
- Use the
+/−buttons to change the number of slots for a role. - Use the trash icon to remove a role from this date entirely.
- Use the Add Role form at the bottom to add a new role with however many slots you need.
Click Done when you’re finished.
These changes apply only to this date. If you actually want every future show to have eight players, edit the show template instead.
Override show details for one date
Section titled “Override show details for one date”If a specific date needs different details — a different name, time, venue, call time, or set of eligible ensembles — you can override those for that date alone too.
Click the pencil next to the show name to open the Edit Date page.

You can override:
- Name — for special editions (“Fundraiser Night,” “Holiday Special”).
- Details — extra notes specific to this performance.
- Schedule by — when this date needs casting, if it’s off the theater’s normal cadence (a road show on short notice, for example).
- Date, start time, end time, and call time.
- Ensembles on this date — change who’s eligible to sign up. Use this for a pro-am show that opens to student players, or any other one-off cast-pool change.
Like role overrides, these changes apply only to this date. They don’t touch the show template or any other date.
Mark it scheduled
Section titled “Mark it scheduled”When the lineup looks right, click Mark as Scheduled in the upper right.
If any roles are unfilled, you’ll be asked what to do with them:
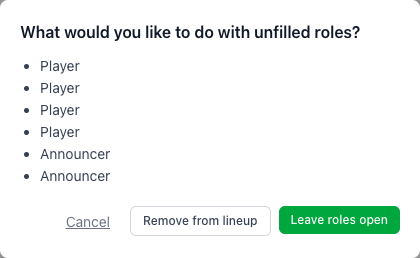
- Leave roles open — keep the empty slots so you can fill them later (e.g., once a sub volunteers).
- Remove from lineup — strip the empty slots from this date’s lineup.
- Cancel — go back without scheduling.
Either non-cancel choice flips the date to scheduled. Marking a show scheduled doesn’t notify players automatically. They see their lineup when you send the lineup announcement or when their notification preferences trigger an automated email.
Related: Handle a sub request · How scheduling windows work